You're just my TYPE card. 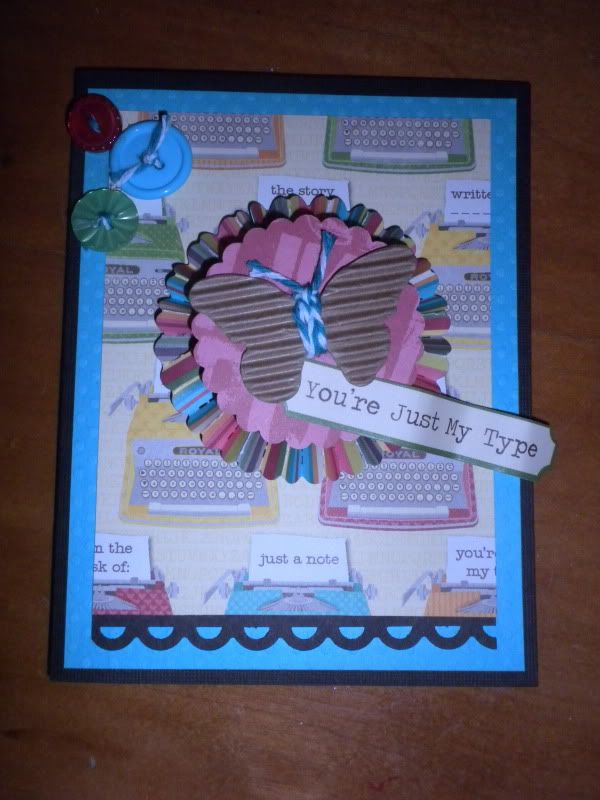 Having fun with the new collection 'sweet n sour soup' from Jillibean soup- in stores now!
Supplies:
dark brown card A2 size
blue or green cardstock mat cut to 5 1/4" x 4"
typewriter pattern paper from Jillibean Soup -
it's called 'crushed tomatoes' cut to 3 1/3" x 4 1/2" 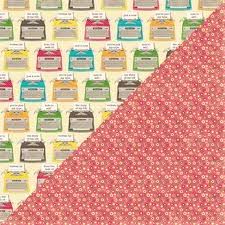 striped side of typewriter key pattern paper from Jillibean Soup- it's called 'raisins' cut to 2" x 12"  letter print pattern paper from Jillibean Soup- it's called 'sour salt'- for punching 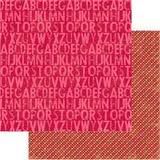 kraft color corrugated sheet from Jillibean Soup- a small piece for die cutting 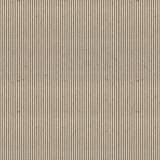 soup labels stickers from Jillibean Soup  dark brown cardstock cut to 3 1/2" x 1 1/2" for punching bakers twine...about 12" buttons Required tools: Big Shot die cutting tool Tim Holtz rosette wafer thin die (you'll need extended platform and cutting plates for the rosette die)
Tim Holtz movers and shapers butterfly dies
(you'll need the base tray to put the movers and shapers butterflies in before running through Big Shot)
edger punch of your choice
2" round scallop punch (or die cut)
your favorite scissors
anti static embossing pouch (baby powder or cornstarch will work too) 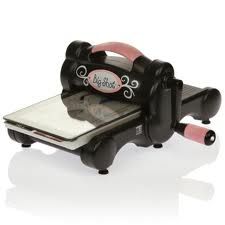 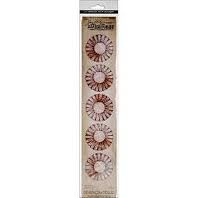     Step 1 Gather supplies cut papers to size listed above use scallop circle punch to punch 1 from the sour salt (red letter) pattern paper
use edge punch to punch a border on 1 long side of your 3 1/2" x 1 1/2" dark brown cardstock
use Big Shot and Tim Holtz rosette die to die cut 1 rosette strip from the raisin (striped) pattern paper
use Big Shot and Tim Holtz mover and shapers butterflies die to die cut 1 butterfly from corrugated sheet 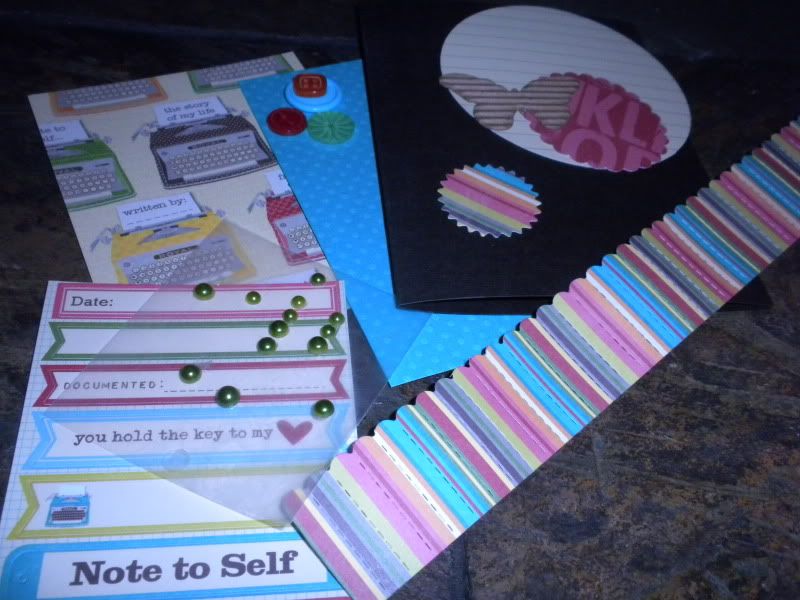  Step 2 Using a tape runner adhere the punched dark cardstock to bottom edge of type writer paper. Then adhere to cut cardstock mat. and then adhere this layered piece to card front. 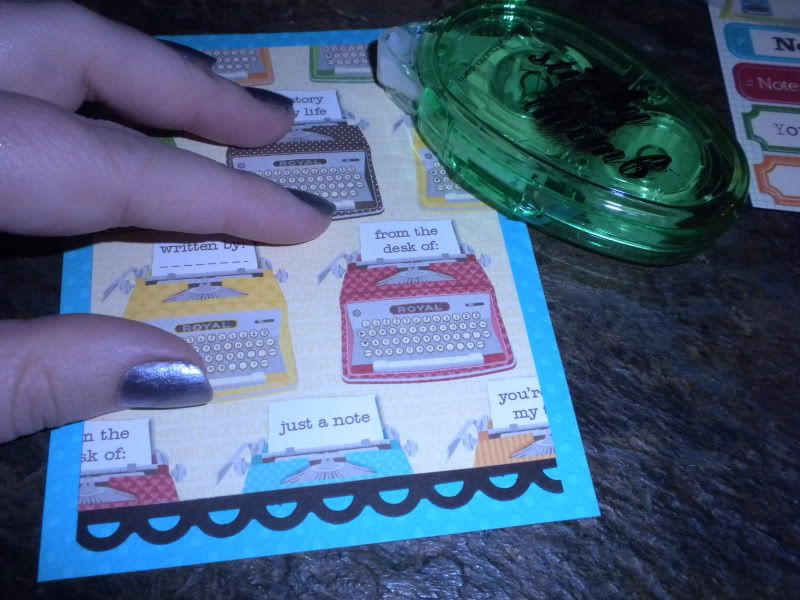 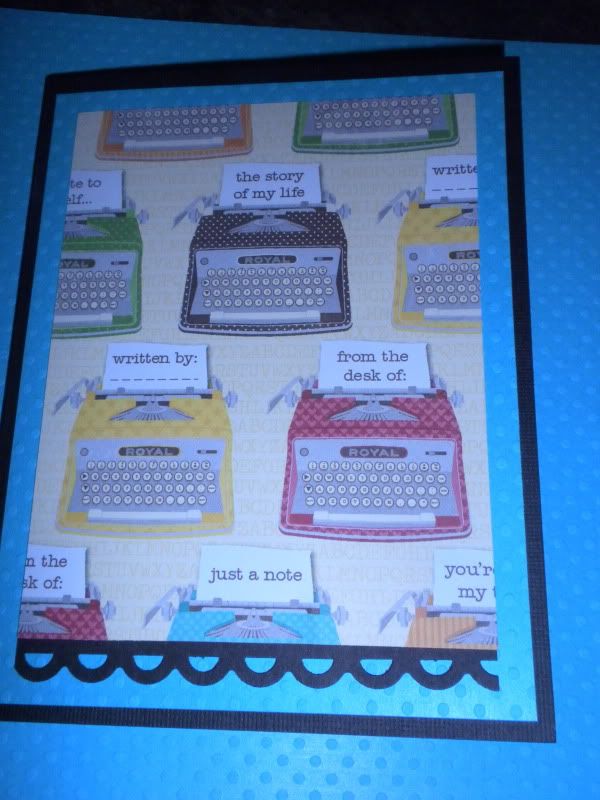 OPTIONAL- since the inside of the card is dark brown, I used a large circle die cutter (or punch) to punch out some lined paper and adhered inside so there is space to write a personal note.
when die cutting the tim holtz rosette, you'll get a little pinking edge die cut as well - normally you use this when putting together the flower, this time I don't need it for the flower, so I used it as a little embellishment on the inside instead, and it helps tie in the colors and pattern from the front of the card. 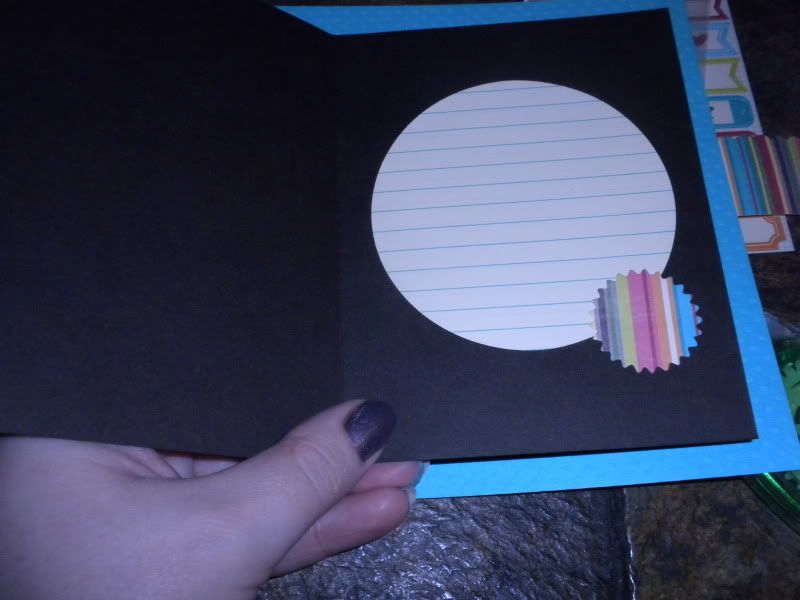 Step 3 Making the rosette. after die cutting, you'll see you have perforation all along the length of your die cut. 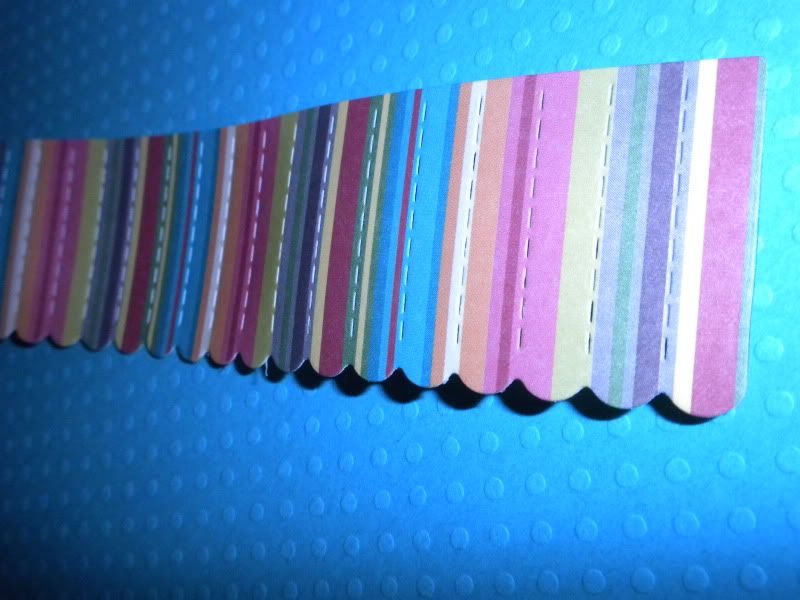 simply accordion fold back and forth, back and forth all along the strip.  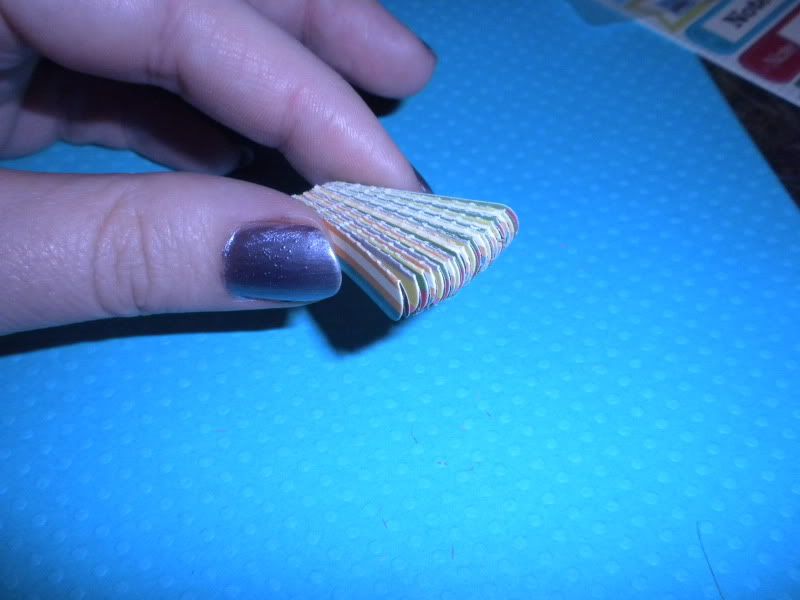 then add a line of red line tape to one end. remove the red film from tape, and adhere the other end of the strip to the first- making a ring. 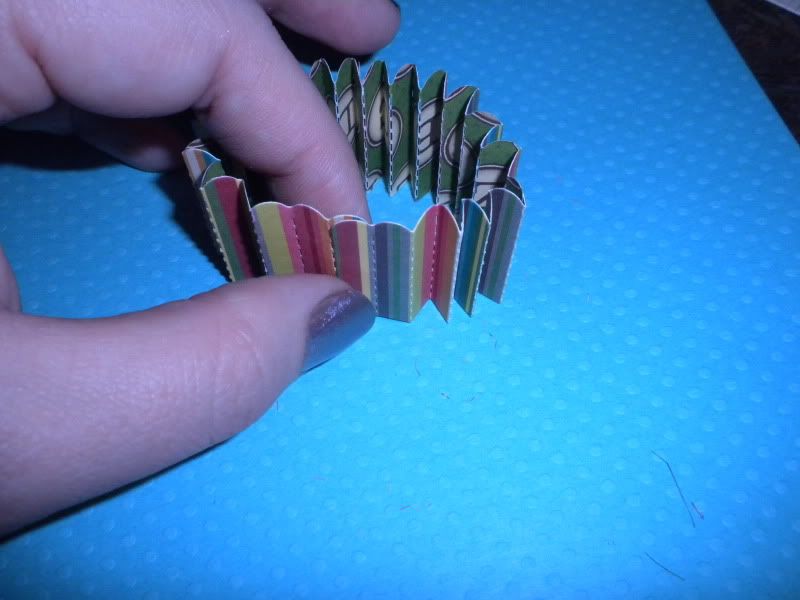 then- have a pop dot ready- and gently push the top edge of the ring down and in at the same time and the pleated edges will fall right into place making a rosette shape- hold in place with one hand until you can set a pop dot right into the middle.
then place your scallop punched paper on top of the glue dot creating a layered-stacked look. 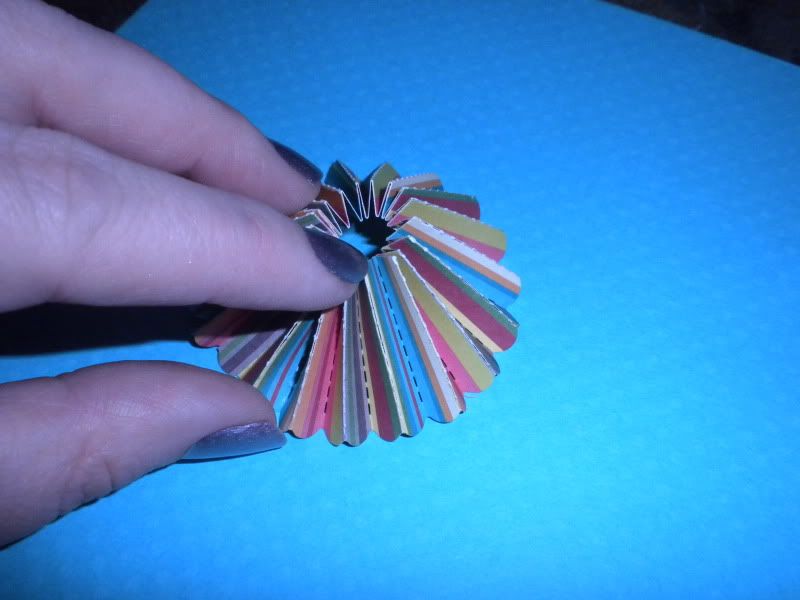 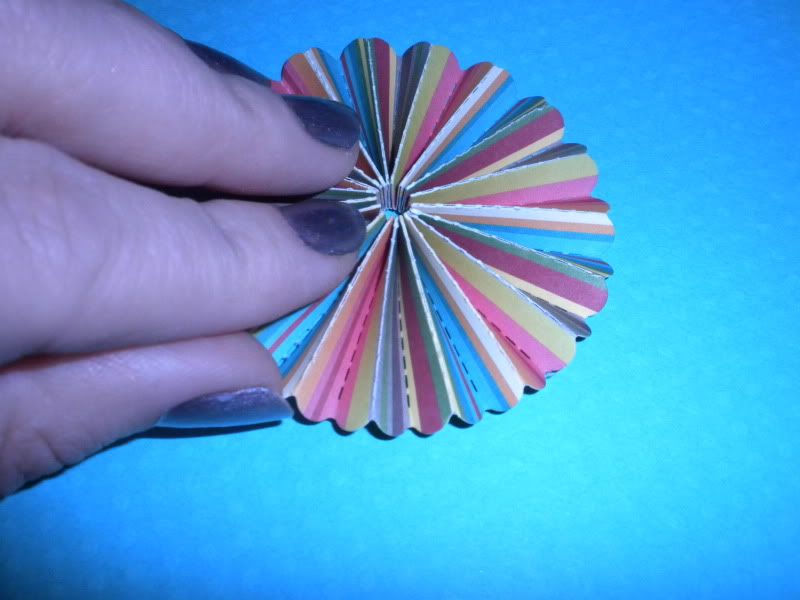 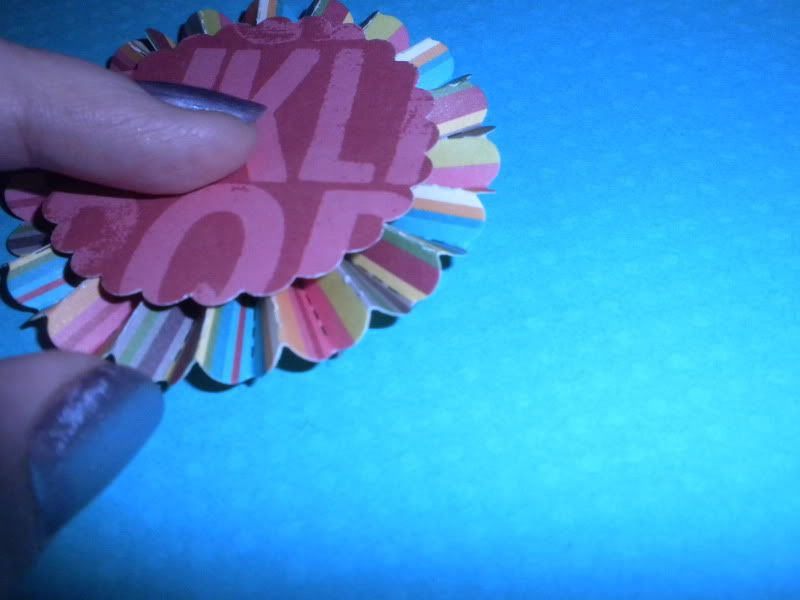 carefully turn your rosette over- and place another glue dot on the back side- right in the middle and then attach to your card front where ever you like.  (please note, once perforated, and then accordion folded , the paper has been through a lot, and is delicate) Be gentle. If it does tear along a perforation you can splice it back together with some additional red line tape, but if you handle it too much... you might need to cut another die and try again. It takes a couple of tries before you get the hang of it, but once you do, you won't be able to stop making rosettes!
Step 4
embellishing your card.
Select a soup label to serve as your greeting. If you want, you can use one of the blank labels and write in your own personal message! 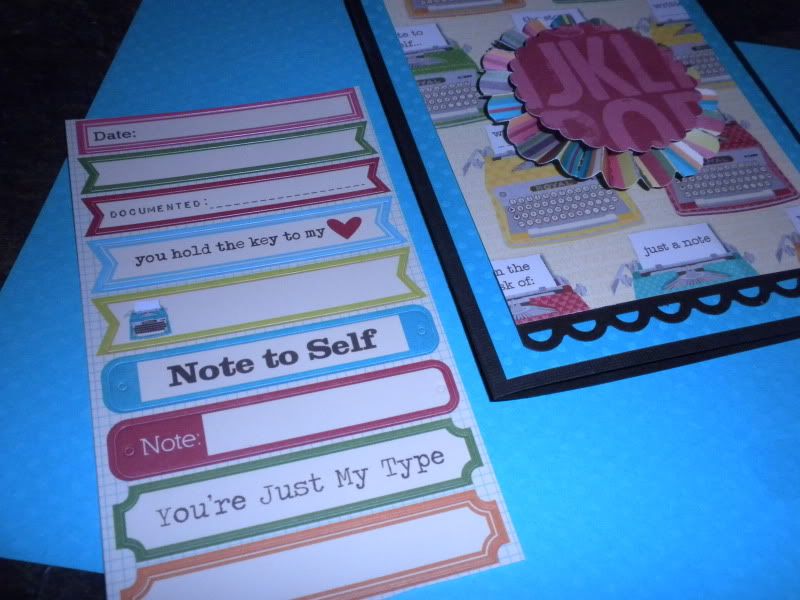 We need to make most of the label NON- sticky. So that we can form it into a 'flag'
To do that:
you'll hang on to the area you want to stay sticky- and then pat your anti static bag on the rest of the adhesive side of the label- making it non-sticky! If you do not have an anti static bag you can use baby powder or cornstarch. You just need a little of the powder to brush across the adhesive side. Now with the portion you did not 'de-stick'  you can attach to your layered rosette on card front.
Then, because these labels are made from cardstock, you can bend it a bit to make it look like it's fluttering in the wind. 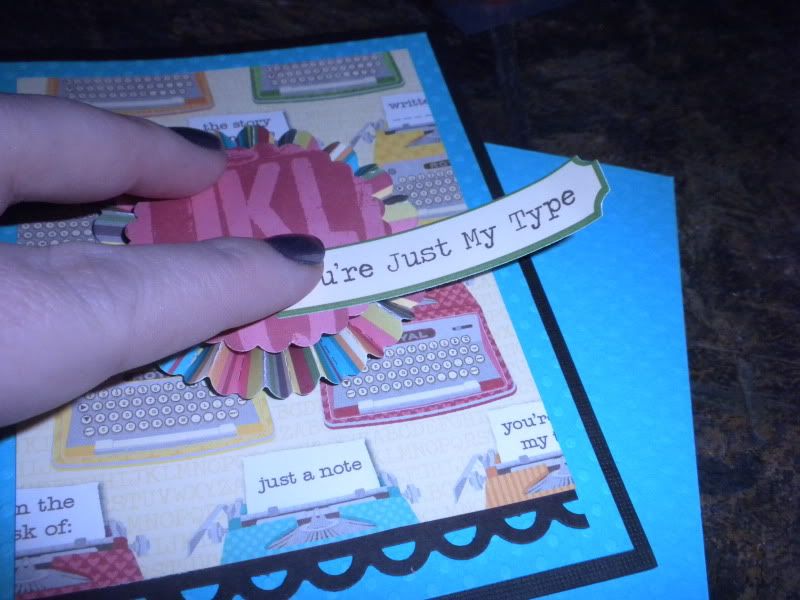  Next wrap the bakers twine around the body of your die cut corrugated butterfly a few times and tie off on top. cut ends- these sort of look like antenna dont you think? 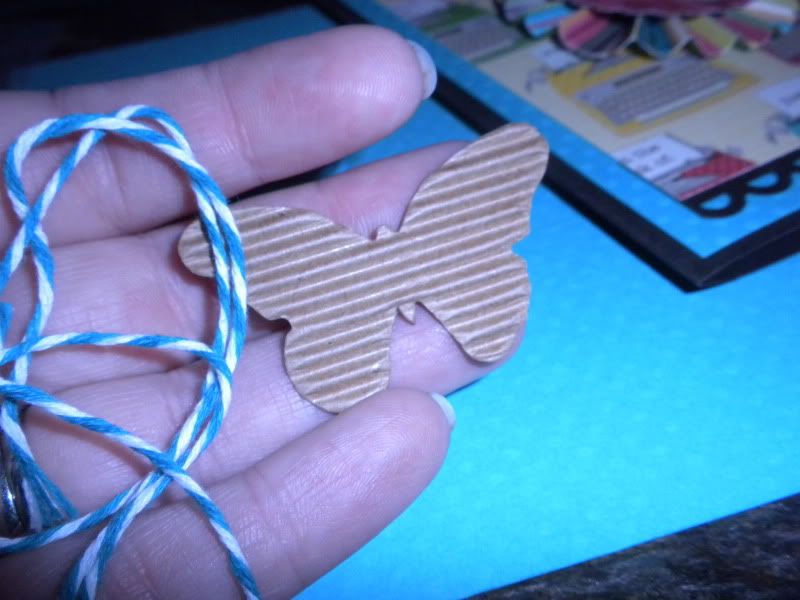    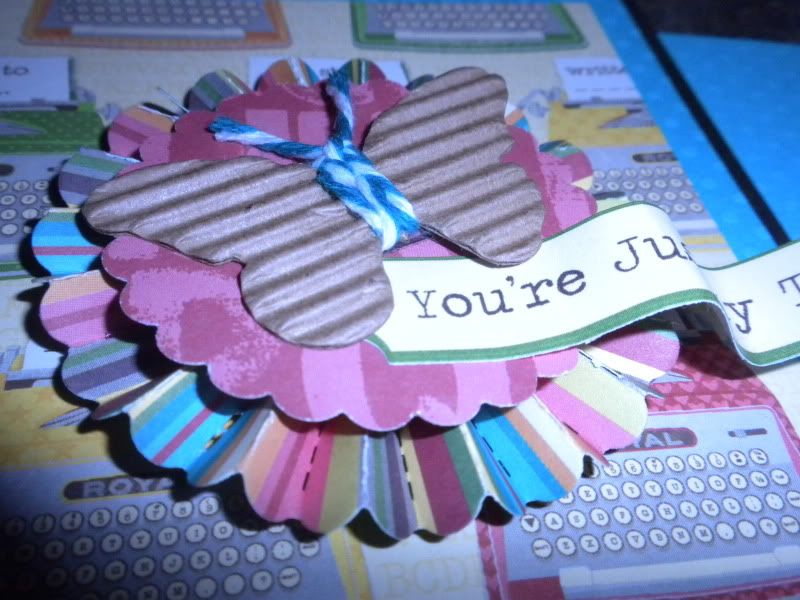 attach to layered rosette on card front add a cluster of buttons in one corner.  If you like, rub an ink pad across the edges of your corrugated butterfly- the ink just hits the top of the fluted paper making for a fun effect. 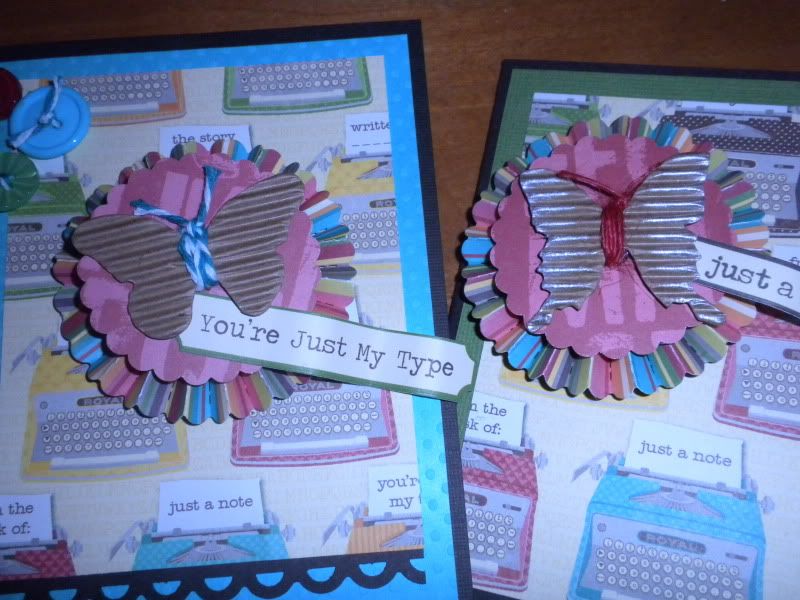 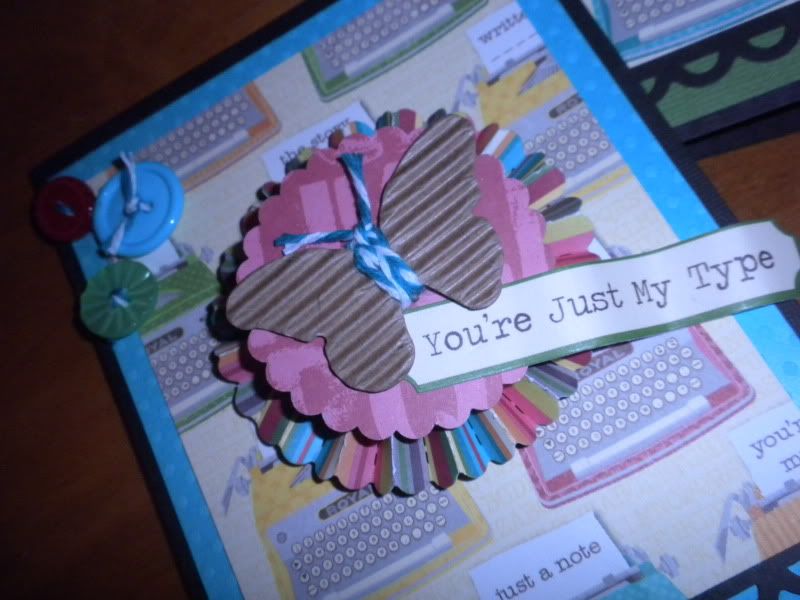 Are you loving the look of the corrugated die cut as much as I am? And that typewriter paper is soooo cute!
Happy Card Making!
Other new products from Jillibean Soup availalbe now:
Christmas Eve Chowder Apple Cheddar Soup Sweet and Sour Soup 6 Bean Homemade Soup Corrugated sheets in 4 colors Corrugated die cut letters in 4 colors soup labels 6x6 paper pads | 


No comments:
Post a Comment
Thank you for your feedback! We love hearing from you!