


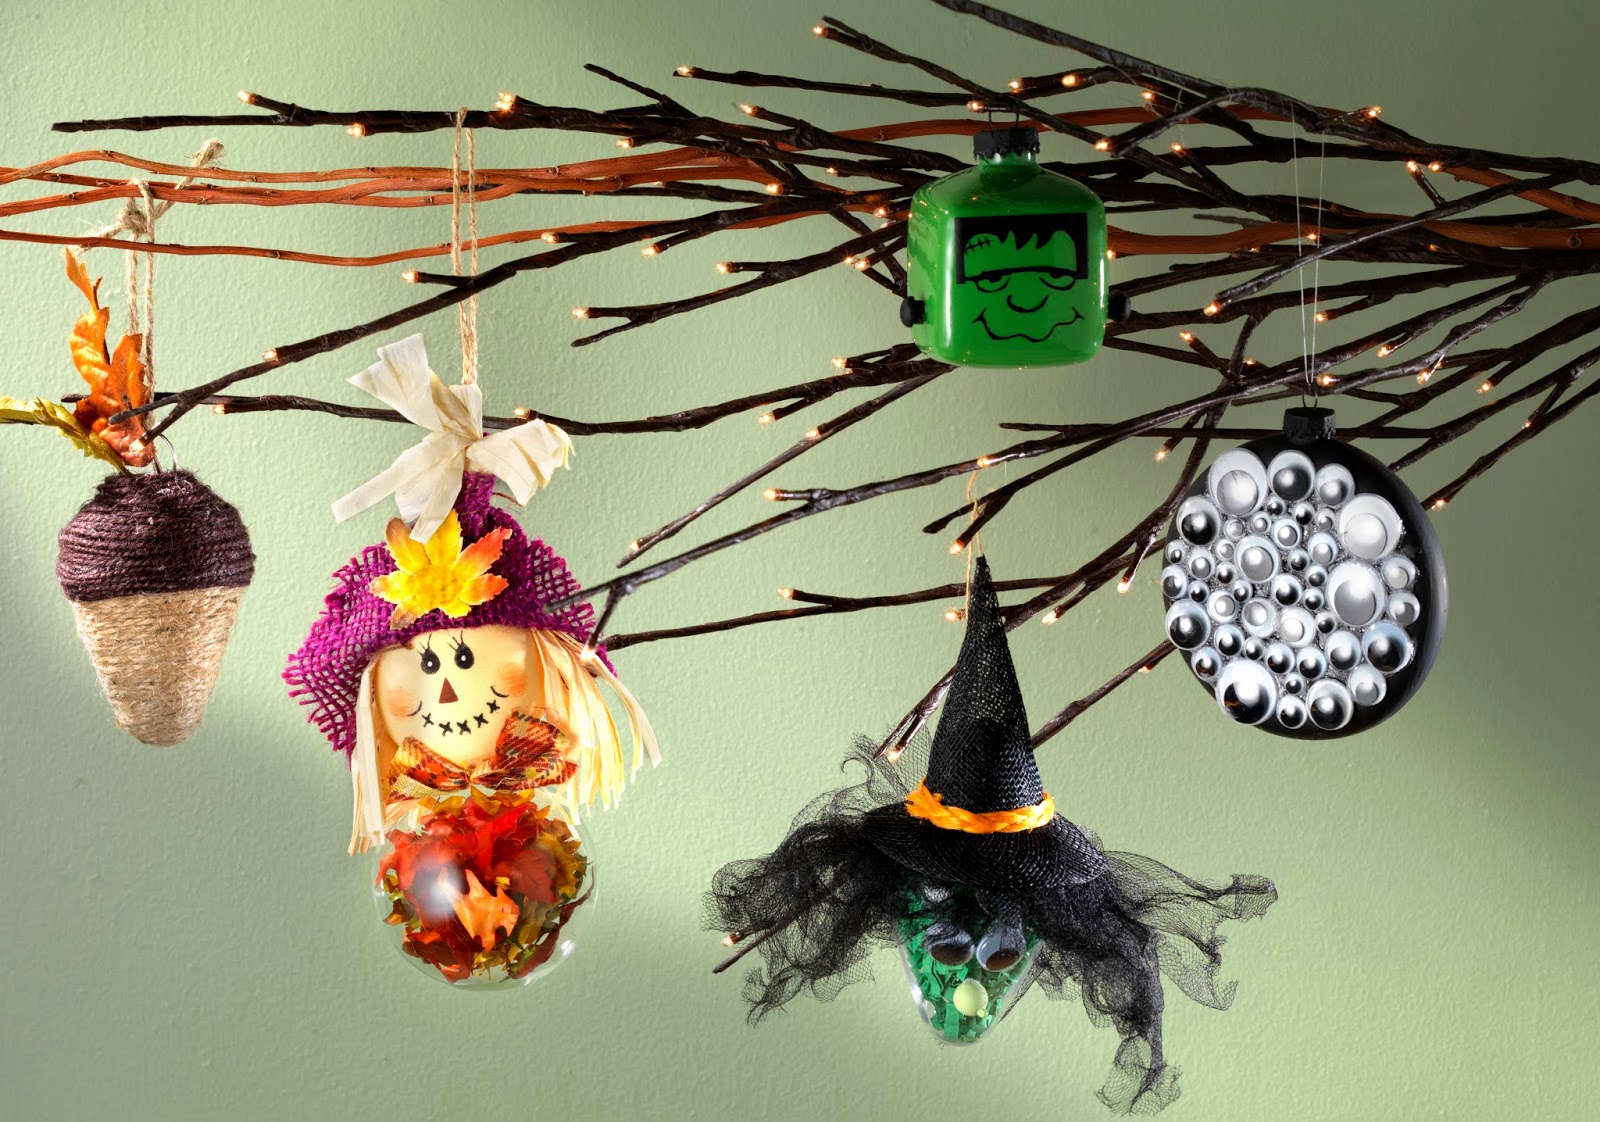
Ornaments aren't just for Christmas! Ornaments are fun to decorate your home and also make great gift toppers! Cute and crafty, seasonal ornaments are right at home on our lighted branches!
created by Dania Carson for Craft Warehouse
Think outside the holiday! Shaped ornaments allow for more creative ideas!

Glass Ornaments

Plastic Ornaments
ACORN
Ingredients:
light bulb plastic ornament
Beacons 3 in 1 glue
Darive 2 ply natural color jute
Canvas Corp chocolate color jute
Artificial fall leaves
Remove the silver ornament cap. Lay a bead of glue around the neck of the ornament and begin winding the natural color jute from the top of the ornament down toward the bottom adding glue as you go. Keep the jute pushed tight up against the row above it. Continue until the entire ornament is covered with natural colored jute. Starting at the top of the ornament again using the chocolate jute lay a bead of glue and wind down a about 1/1/2 inches from the top gluing as you go to create an acorn cap. Take the wire loop out of the ornament cap and slide it inside the ornament keeping the loop outside the top. glue artificial leaves at the top of the acorn.
SCARECROW
Ingredients:
2 5/8" round ornament
1 pkg artificial mini fall leaves
1 pkg scarecrow heads
hot glue and glue gun
Remove the ornament cap and fill the ornament with the package of mini fall leaves. Put the cap back on the ornament and hot glue the scarecrow head to the top of the ornament.
WITCH HEAD
Ingredients:
light bulb shaped ornament
green paper crimps
wiggly eyes
black tulle
green paint
small wooden ball
1 seed bead
Beacons 3 in 1 glue
sinamay witch hat
Remove the ornament cap and fill the ornament with green paper krimps then put the cap back on. Glue the seed bead to the small wooden ball with the 3in1 glue and set aside to dry. Cut the black tulle into 4 5" lengths, stack them on top of each other and tie a knot in the center. shred the tulle using scissors, glue the knot of tulle at the top of the ornament about around the upper edgae of the ornament. scrunch the tulle to create a fabulous frizzy look. Glue the sinamay that to the top. paint the mini wood ball with the green paint and let dry, glue the wiggly eyes to the ornament and glue the green ball nose to the witch face.
FRANKENSTEIN CUBE ORNAMENT
Ingredients:
glass cube ornaments
green paint
vinyl words
vinyl mini Frankenstein face
mini wooden screw covers
black paint
Beacons 3 in 1 glue
Remove the cap of the cube ornament. Pour green paint inside the ornament and swirl to cover the entire inside of the ornament. Turn the ornament upside down to allow the excess paint to drain out. (this works really well in an egg carton). Paint 2 of the screw covers and the ornament cap black and let dry. After the ornament has drained of excess paint (its best to let it dry for a while). Put the cap that has been painted black back on top. Rub on the vinyl face and then glue the screw covers to the sides of the ornament as neck bolts.
GLOW IN THE DARK MULTI-EYED ORNAMENT
Ingredients:
flat glass disc ornament
1pkg asst sizeglow in the dark wiggly eyes
black paint
Beacons 3 in 1 glue
Paint the outside of the flat disc ornament with black ceramcoat paint and let dry. Be sure to paint the ornament cap as well. After it has dried, using the 3 in 1 glue, glue the assored eyes covering the surface of the ornament. Start with the largest sizes and place them randomly then work down in size to the tinier eyes filling in as many of the empty spaces as you can.
* Your choice of Clear Glass Boxed Ornaments only $5 (reg $7.99) and Plastic Ornaments only $1 each (reg $1.99) until October 27th, 2013

No comments:
Post a Comment
Thank you for your feedback! We love hearing from you!